OPEN FROM 9AM TO 5PM – CLOSED ON WEEKENDS
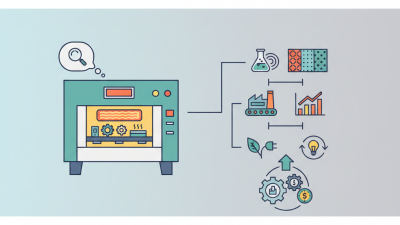
A curing oven is a controlled heating chamber used to harden coatings, paints, adhesives, and composite materials. Unlike simple drying, curing creates a deeper chemical or physical change. The result is usually a tougher surface, stronger bonding, and improved resistance to moisture, chemicals, and wear.
In a well-managed finishing shop, technicians load coated parts into the chamber and set a specific time and temperature profile. Heated air circulates around the parts, while sensors monitor the chamber conditions. For powder coating, the coating melts, flows across the surface, and forms a continuous film as it cures. The actual metal temperature matters more than the oven’s displayed temperature. That detail is often overlooked.
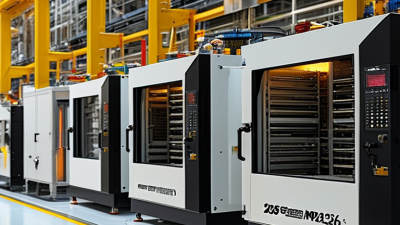
A modern curing oven may use gas burners, electric heating elements, fans, insulation, and digital controls. Batch ovens handle smaller or varied workloads. Conveyor ovens support continuous production. Both systems require balanced airflow and regular calibration. Cold spots can leave a coating soft, while excessive heat may discolor parts or damage sensitive materials.
No oven is perfectly uniform. Even experienced operators can misjudge load spacing or curing time. A reliable process therefore includes test panels, temperature probes, maintenance records, and documented coating specifications. These checks reveal problems that a control screen may hide. This article explains what a curing oven does, how heat moves through it, and why careful process control determines the final result.
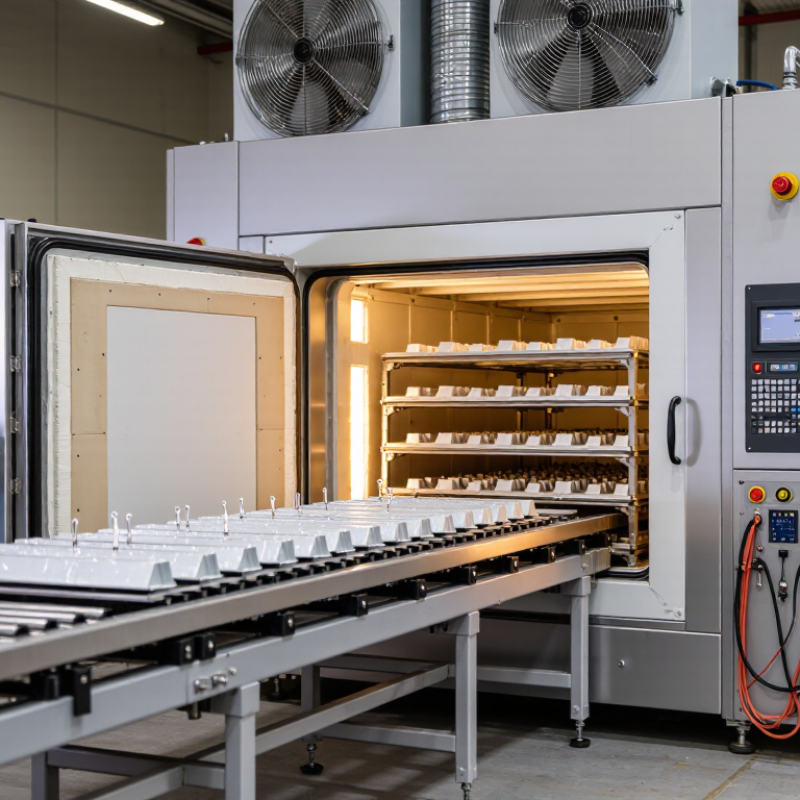
A curing oven is a controlled chamber that hardens coatings, adhesives, composites, or other materials through heat. Unlike a household oven, it manages temperature, airflow, and exposure time with greater precision. The heat helps chemical components react, allowing polymers to cross-link and form a durable surface. This process can improve hardness, adhesion, chemical resistance, and long-term stability.
Inside the chamber, heaters raise the air temperature gradually. Fans circulate air around the workpiece, reducing hot and cold areas. Sensors monitor the chamber, while controllers maintain the selected curing profile. The actual material temperature matters more than the display reading. Thick parts may need extra time to heat through.
Operators usually check the coating specification before selecting a cycle. They may record temperature readings from the part itself, not only from the oven. Ventilation also matters because some materials release vapors during curing. Poor airflow can create bubbles, soft spots, or uneven color. I have found that rushing this stage often causes rework. Still, no curing oven performs perfectly without regular calibration and cleaning. Door seals, fans, sensors, and filters can slowly affect results. A practical process leaves room for testing, adjustment, and honest review.
A curing oven uses controlled heat to complete chemical reactions in coatings, composites, adhesives, and molded parts. The typical cycle below shows a representative industrial curing profile: heating, temperature hold, and cooling.
The oven first raises the part to the required cure temperature, commonly within the range of 160–200°C for many heat-cured coatings. The temperature is then held for a defined dwell period so the material can cross-link or harden uniformly before controlled cooling.
A curing oven uses controlled heat, airflow, and time to harden coatings, adhesives, or composite resins.
It does more than dry a surface. Heat activates chemical cross-linking, creating a tougher and more stable finish. The required temperature depends on the material, part thickness, and production speed.
Thermoset powder coatings commonly need oven curing on steel, aluminum, and other metal parts. These include appliance panels, electrical enclosures, shelving, automotive components, and agricultural equipment. Many powder systems cure between 160°C and 220°C, although the part surface must reach the specified temperature.
Liquid coatings may also require heated curing when air drying cannot provide enough hardness or chemical resistance.
Epoxy adhesives, fiber-reinforced composites, prepregs, and certain sealants need oven curing too. Their heat cycle controls strength, stiffness, and dimensional stability.
Some ceramic coatings and industrial linings use staged heating to remove moisture and solvents safely.
The energy cost is easy to underestimate.
The U.S. Department of Energy’s Industrial Decarbonization Roadmap reports that process heating represents about 51% of manufacturing energy use. A poorly loaded oven can waste significant energy. Performance can also vary across one large part.
Confirm the manufacturer’s time-temperature schedule, then measure the actual metal temperature with data logging.
Do not rely only on air temperature. Check airflow, rack spacing, and oven calibration regularly.
A small test panel may reveal under-cured edges or overheated corners before full production.
In practice, the “correct” cycle often needs adjustment, and that uncertainty deserves documentation.
A curing oven transforms a wet coating, powder layer, adhesive, or composite resin into a stable finished surface. The process depends on controlled heat, airflow, and time. The U.S. Department of Energy’s 2018 Manufacturing Energy and Carbon Footprints report estimates that process heating consumes about 51% of manufacturing energy. That figure explains why oven control matters beyond appearance.
The cycle begins when an operator loads parts with enough spacing for air movement. Sensors check chamber temperature, while separate probes can measure the part itself. The oven then heats gradually, reducing thermal shock and uneven curing. Once the part reaches the required metal temperature, the binder or resin starts its chemical reaction. Air circulation removes cooler pockets and carries away moisture or solvents. Not glamorous, but essential.
The operator holds the part at the specified temperature for the required dwell time. A 180°C chamber does not mean the part instantly reaches 180°C. Thick steel may need several minutes longer than thin sheet. Industry testing standards, including ISO 8130.8 for powder coating evaluation, support checking cure performance rather than trusting surface appearance alone. A hard surface can still hide incomplete curing. That mistake happens.
Cooling follows outside the heating zone or inside a controlled section, depending on the equipment. Records should capture setpoint, actual part temperature, dwell time, and alarms. One overlooked probe can weaken the whole result.
A curing oven applies controlled heat, light, or airflow to harden coatings, adhesives, inks, and composite materials. The process removes solvents or activates chemical reactions inside the coating. Temperature, exposure time, air movement, and load spacing all affect the final result. A surface may feel dry while the deeper layer remains soft.
Convection ovens heat surrounding air and circulate it across the workpiece. They suit powder coatings, painted metal, and larger batches.
Infrared ovens transfer radiant energy directly to the surface, reducing warm-up time. However, thick or shaded areas may cure unevenly.
Ultraviolet systems use focused UV energy to cure compatible coatings within seconds. They need line-of-sight exposure and specially formulated materials.
Batch ovens handle varied parts and small production runs.
Continuous ovens move parts through heating zones, supporting consistent, higher-volume work.
Tips:
What Is a Curing Oven and How Does It Work?
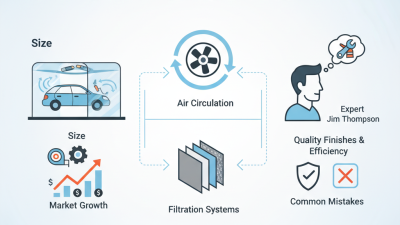
Which Factors Affect Curing Quality and Efficiency?
A curing oven heats coated parts until the coating reaches its required curing temperature. Heat moves through convection, radiation, or both. The real challenge is measuring part temperature, not merely oven air temperature. A display may show 200°C while a heavy steel bracket remains under-cured. Line speed, metal thickness, coating mass, and loading density all change the heating curve.
Airflow matters greatly. Poor circulation creates cold zones near corners, doors, and crowded racks. Excessive airflow can waste energy without improving cure quality. According to the U.S. Department of Energy’s Industrial Decarbonization Roadmap, process heating represents about 51% of manufacturing energy use in the United States. Small improvements can therefore have measurable value. The International Energy Agency’s Energy Efficiency 2023 report also estimates industry consumes about 37% of global final energy.
Humidity, surface preparation, film thickness, and burner calibration affect results. Operators should record actual part temperatures with calibrated data loggers. ASTM D5402 solvent-rub testing can help verify coating cure, while ISO 8130 testing supports powder-coating quality control. A practical trial should compare several conveyor speeds and load patterns. One setting may look perfect today, then fail after a colder shift. Not every defect is an oven defect. Sometimes the measurement method is the weakest link.
| Data Dimension | Typical Range or Condition | How It Affects Curing | Practical Control Method |
|---|---|---|---|
| Definition | An insulated industrial oven used to heat, dry, polymerize, or harden coatings, adhesives, composites, and treated components. | Provides a controlled thermal environment so the material reaches its specified curing condition. | Use a validated temperature profile and follow the material supplier’s technical data sheet. |
| Basic Operating Principle | Heaters transfer energy to circulating air, the workpiece surface, and eventually the interior of the load. | Uniform heat transfer promotes consistent solvent evaporation, cross-linking, and final mechanical properties. | Maintain balanced airflow, sufficient heating capacity, and stable temperature control. |
| Common Curing Applications | Powder coatings, liquid coatings, industrial paints, adhesives, sealants, composites, and heat-treated assemblies. | Each application has different heating rates, dwell times, ventilation requirements, and final-property targets. | Separate recipes by material type, coating thickness, part geometry, and load configuration. |
| Typical Operating Temperature | Approximately 80–250°C for many industrial coatings and adhesives; the exact value depends on the formulation. | Temperature that is too low may cause under-cure, while excessive temperature may cause discoloration, blistering, or degradation. | Use calibrated sensors and control the actual part temperature rather than relying only on the air temperature. |
| Curing Time | Often 10–60 minutes at the required part temperature, excluding heat-up and cool-down time. | Insufficient dwell time can leave the coating soft or chemically incomplete; excessive time can reduce productivity and waste energy. | Measure time after the coldest part reaches the specified curing temperature. |
| Ramp or Heat-Up Rate | Commonly controlled within approximately 1–10°C per minute, depending on the material and part design. | A rapid ramp may trap solvents or create thermal stress; a slow ramp may reduce throughput. | Create a programmed heating profile and verify it with data loggers placed on representative parts. |
| Temperature Uniformity | A well-tuned oven may target approximately ±3–5°C in the working zone, subject to equipment design and load conditions. | Temperature variation can produce inconsistent gloss, hardness, adhesion, color, and chemical resistance. | Perform temperature uniformity surveys at empty and loaded conditions; adjust airflow and heater settings as needed. |
| Airflow and Circulation | Forced convection is commonly used to circulate heated air throughout the chamber. | Poor circulation creates hot spots, cold zones, uneven solvent removal, and nonuniform curing. | Keep air paths clear, maintain fans and filters, and avoid blocking supply or return ducts. |
| Load Size and Arrangement | Load density, part spacing, part mass, and rack position can substantially change heat transfer. | Overloading or tightly packed parts may extend heat-up time and create uneven curing. | Define maximum load limits and maintain consistent spacing between parts and racks. |
| Part Thickness and Thermal Mass | Thin parts heat quickly; thick or high-mass components may require considerably longer heat-up periods. | The surface can reach the setpoint before the center, causing incomplete curing in thick sections. | Monitor the coldest or thickest section and establish separate recipes for different part families. |
| Coating or Material Thickness | Coating thickness must remain within the process specification; excessive film build is a common source of defects. | Thick films may retain solvents, sag, blister, or require additional time to cure fully. | Measure wet or dry film thickness and adjust application settings before changing oven conditions. |
| Ventilation and Exhaust | Exhaust removes moisture, solvents, and combustion by-products; the required rate depends on the process chemistry. | Insufficient exhaust may cause solvent retention, odor, unsafe vapor accumulation, or surface defects. | Balance exhaust with make-up air and verify compliance with applicable workplace and fire-safety requirements. |
| Surface Preparation | The substrate should be clean, dry, and free from oil, dust, rust, salts, and other contaminants. | Poor preparation can cause adhesion loss, pinholes, craters, corrosion, and premature failure even when oven settings are correct. | Use a documented cleaning and pretreatment process with routine surface inspections. |
| Moisture and Humidity | Moisture-sensitive materials and damp substrates require controlled storage and drying before curing. | Residual moisture can cause bubbles, pinholes, adhesion problems, and inconsistent chemical reactions. | Store materials correctly, pre-dry damp components, and monitor humidity where required. |
| Oven Insulation and Door Seals | Insulation should limit heat loss, while door seals should prevent uncontrolled air leakage. | Heat loss increases energy consumption and may cause temperature instability or longer cycle times. | Inspect insulation, hinges, doors, and gaskets regularly; repair visible damage promptly. |
| Temperature Measurement | Fixed sensors control oven air temperature; portable thermocouples or data loggers measure actual part temperature. | Air temperature alone may not represent the thermal condition of the part. | Calibrate sensors on a scheduled basis and verify readings against traceable reference equipment. |
| Curing Quality Indicators | Adhesion, hardness, gloss, color, flexibility, solvent resistance, and appearance. | These properties reveal whether the process achieved the required level of cure and finish. | Use appropriate inspection methods such as visual checks, thickness measurement, adhesion testing, and hardness testing. |
| Energy Efficiency | Affected by setpoint, cycle time, insulation, exhaust rate, door opening, load utilization, and heat recovery. | Unnecessary heat loss and underfilled batches increase energy use per cured part. | Optimize batch size, minimize idle operation, maintain seals, and consider heat recovery where practical. |
| Common Curing Defects | Under-cure, over-cure, blistering, pinholes, orange peel, sagging, discoloration, and uneven gloss. | Defects may result from incorrect temperature, time, airflow, film thickness, contamination, or ventilation. | Use process records and structured troubleshooting to identify whether the cause is material-, application-, or oven-related. |
| Process Validation | A validated process confirms temperature, time, airflow, and load conditions repeatedly produce acceptable results. | Validation reduces variation and provides evidence that the process can meet quality requirements. | Document recipes, conduct periodic thermal profiling, record deviations, and revalidate after major changes. |
Note: Actual curing temperature, time, ventilation, and acceptance criteria must be determined from the specific material formulation, part design, equipment capability, and applicable safety requirements.